Thursday, 27 December 2012

Purple & Gray Table Runner

This was made for a Christmas gift and because I didn't want it to be seen ahead of time, I haven't posted it yet - just a sneak peek on my Facebook page. I've had these bright colours here for a while and love the way they pop with a gray background!
 This size of table runner is so versatile - here it is on my dresser as a dresser scarf - great bedroom accent piece!
 Quilting is kept simple with a meandering all-over machine quilted pattern.
 And binding is machine stitched to the back and then top-stitches to the front.
And backed with a muted lavender print! I hope the recipient was happy when she opened this gift!

--Ann

Tuesday, 18 December 2012

WIP Wednesday - December 19

This bright colored quilt was finished today for my grand-daughter. She's the one busy making art in the picture below!
Charm square quilt
Beautiful artist!
These are the fat quarters of fabric I started with and the photo on the right is what I originally thought I'd make. I cut each fat quarter into a couple 2.25" strips for binding and the rest into 5" charm squares. (I've lost my work sheet that I used to figure it all out, so there are no exact instructions here today!)

I love my design wall because I can see the whole design before I sew anything together. In this case, the layout was just too busy for me - it came down rather quickly as it seemed to jar my senses every time I looked at it. After some rearranging and rethinking the design, this was the final result! 5" charm squares separated by 2.5"x5" strips of white Kona cotton, put together in rows.

Normally I send my bed size quilts out to be quilted, but this quilt was quilted by me on my Janome 4030QDC machine with straight line quilting. The back is a pretty butterfly flannel that will coordinate with the butterfly sheets that will be on her bed (totally unplanned!) The binding was machine stitched to the backing, flipped to the front and top-stitched by machine for a beautiful finish. I've only recently started to machine stitch my binding and it's amazing how quickly it goes.

How about you? Do you make quilts for special people? Do these quilts always go as planned or do you change things up as you go?

--Ann

Linking up with:
Quiltsy WIP Wednesday #41
Needle and Thread Network WIP Wednesday #70
Freshly Pieced WIP Wednesday


Seasons Mini Quilt Swap

Maple Leaf Seasons Mini Quilt
Summer leaf details
Here's the finish on the Season's Mini Quilt that I posted about earlier this month. The maple leaf block is one I've used many times, but this time I didn't piece the stem. Instead, I machine stitched the veins in the leaves and the stem with a variegated green thread and then did a close stippling on the sky blue background.

I'm still waiting patiently for the quilt my partner made for me and will post it here as soon as I get it!

--Ann 

Monday, 17 December 2012

Custom Quilts Headed to Texas


 Just came back from the Post Office where I sent these quilts off to their new home in Texas! It's so exciting to see where my quilts are ending up and these bright blue quilts were a pleasure to make.

These photos are taken in our basement guest room which was repainted earlier this year from a chocolate brown to a creamy white. The room is much brighter now and the neutral colour means I can now take photos of my quilts there. I still need to make curtains for the window and am thinking that just a plain bleached muslin fabric would be perfect with a little black trim or  embroidery to add some detail.


Blue Tempest #1
Blue Tempest #2
The pattern chosen by the customer was the Tempest from Cherry House Quilts. Isn't it gorgeous here in shades of purple Kona cottons? The pattern was lost in transit and so I just improvised so I could get these quilts completed, but Cherri is resending, so I'll have a copy soon! Cherri is the author of the quilt book "City Quilts" which I've borrowed from the library and is on my quilt book wish list!


My sewing machine has been humming and I will be busy this week finishing gifts for Christmas!

--Ann

Tuesday, 4 December 2012

WIP Wednesday - December 5

My Little Chickadees from HoneynCloves
 I think I've burnt out on making quilted stuff for my Etsy shop and am ready to make a few things for myself! I recently bought this little chickadee wool kit off Etsy from HoneynCloves and I hope to piece it together over the holidays. Just a little low key, relaxing handwork.
Four Seasons Mini Quilt Swap on Flickr
And I did sign up for another mini quilt swap on Flickr and the due date was November 30. I had lots of wonderful ideas in my head and thought I'd have plenty of time to finish this, but only got it done today! Here's a peek and you'll see the whole quilt when my swap partner receives it. And here's the link to the Flickr Mini QT group so you can see the other mini's that were swapped!
Blue Tempest Quilt (pattern from Cherry House)
The twin custom quilts and pillow shams are at Blueberry Hill Quilts in Chestermere, Alberta to be quilted by Marie. Someone asked me about the pattern last week and it's based on the Tempest pattern from Cherry House quilts. I did order the pattern off the Cherry House website, but it has not yet arrived, so I'm just winging it from the photos.

Today I am linking up with other quilters at:
Quiltsy WIP Wednesday #39
The Needle and Thread Network WIP Wednesday #68

--Ann

Wednesday, 28 November 2012

Blue, Blue, this Quilt is Blue!

I've been working over the past month collecting blue fabrics and now piecing them together for a custom quilt order for a Texas customer. She has ordered two twin quilts complete with pillow shams for her son's room.
Stacks of Blue
Just a few blocks done
I love these shades of blue - they make me think about sailing on the ocean! I have one quilt top done today and the other will be done tomorrow and then they are off to Marie of Blueberry Hill Quilts to be quilted!

--Ann

I am linking with Quiltsy WIP Wednesday #38
and The Needle and Thread Network WIP Wednesday #67

Wednesday, 31 October 2012

One Block Wonder Finished

Some quilts are completed quickly and others need time to percolate and age before they are finished. This one block wonder quilt was one that needed time. I rarely take classes, preferring to spend my $ on fabric than techniques I can learn online or through a book. My local quilt store, Along Came Quilting offered this class a few years ago and I loved the sample and signed up!

The first part of constructing this quilt was the hexagons that are made from little triangles. 6 layers of fabric were layered so that the pattern was matched on all 6 layers. With a new blade in the rotary cutter, strips were cut and then triangles and each set of six identical pieces were pinned together so they wouldn't get mixed up.


The second part was the 3-D blocks that are set into the background of kaleidoscope hexagons. These were fun to make, but difficult to incorporate into the background. There was a lot of playing with pieces on the design wall to come up with a final design that was pleasing to the eye!


But, finally, all the pieces were sewn together and I wasn't please with how it looked at that time. So off to the back of the closet it went to age. I took it out again recently and took a few seams out and redid it so the blocks flowed out into the borders and now I'm so happy this one is done! I still have a piece of fabric in my stash that was meant for another one of these. . . I wonder if it will take as long as the first one!

Do you have a project that needed time to age before finishing?

--Ann


Monday, 29 October 2012

String Piecing Mug Rugs

I am a scrap fabric hoarder saver and this past week I took out my string fabric scraps. Strips of fabric that are larger than 3/4" and smaller than 2" are perfect for string quilts. I used some of my scraps up last year in this quilt that was made with a blocks from my online quilting friends:
Scrappy strings Baby Quilt
But I still have quite a few left and thought I'd use them for some craft sale projects. First thing I did was separate the strips by colour
Scrappy Strings ready to sew
 And on a piece of batting that was about 7"x9", I started sewing strips down, quilting as I went. The first strip goes on right side up and then the next strip right sides down on top of the first strip, lining up the edges. Sew a 1/4" seam and press open. Repeat on both sides of the first strip until the batting is covered.
Adding string scraps to batting
Trim square - I trimmed mine to 6.5"x8.5". Add backing fabric and bind as you would a normal quilt. Or if you're adventuresome, try turning your backing fabric to the front as binding.
Scrappy String Mug Rugs
And there I have some mug rugs (snack mats) that used up some of my scraps and hopefully will be great sellers at the craft sale I'm in on Saturday!

--Ann

Linking up with:
Quiltsy WIP Wednesday #34
Needle and Thread Network WIP Wednesday #63
Freshly Pieced WIP Wednesday

Tuesday, 23 October 2012

Tutorial - Placemats and Napkins

If you haven't entered to win the fall placemat and napkin set that will be given away on October 25, 2012 - click here and enter a comment. And if you want to make your own set, here's the how-to:


PLACEMAT AND NAPKINS
Materials Needed for 1 placemat and 1 napkin:
  • .5 yard (meter) Fabric A (front)
  • .5 yard (meter) Fabric B (border and backing fabric)
  • low loft batting 16"x20" (40.5cm x 51cm)
From Fabric B, cut 1x 18.5"x22" rectangle (placemat)
From Fabric B, cut 1x 18.5"x18.5" square (napkin)

Iron under 1/2" on all 4 sides on both pieces of Fabric B.

 Mark a point 3" (napkins, use 2") from each corner and draw a line joining the points.


Fold the corner in half right sides together and stitch along the drawn line, repeat on the other 3 corners.


Trim seams to 3/8", turn right sides out and press. This is the backing and the mitred border all done in one step!


Cut batting and Fabric A 3/16" smaller than outside measurements of the backing piece. (Napkin will not need batting.)

Slide batting and Fabric A (fabric only for napkin) under the flange of the backing/border and press. Pin to stabilize and edge-stitch all around the edges of the flange. If you want, you can quilt the centre of the placemat.


And there you go - easy peasy!

--Ann

Wednesday, 17 October 2012

WIP Wednesday - October 17

Just thought I'd pop in and let you see what I've been working on the past couple days - it sure feels like Santa's workshop with all these lovely Christmas fabrics!


--Ann

Linking up with:
Quiltsy WIP Wednesday #32
Needle and Thread Network WIP Wednesday #61
Freshly Pieced

Tuesday, 16 October 2012

Tutorial - Fabric Basket

A year or so ago, my friend Marie taught me how to make these unique little fabric baskets. This is a perfect project for those fat quarters that you love, but don't want to cut into little pieces for a quilt! I'm making mine today with some Halloween themed fat quarters I won from Monika at Quiltlover from her Facebook page. I hope she likes what I decided to do with her fabrics!
Fabric Basket - FOR SALE

FABRIC BASKETS
Material list:
  • 2 coordinating fat quarters (Fabric A-outside, Fabric B-inside)
  • 1 piece batting 12.5" square
  • 4 buttons
  • basic sewing supplies
This project involves hand sewing - I'm sure after making a few of these, a sewing maven could figure out a few machine short-cuts! My green fabric with the black cats is Fabric A, and my Fabric B is purple. Click on any of the pictures for a close-up!

Layer your fat quarters on top of each other on your cutting board and cut a 12.5" square - or you can cut each one separately - it's entirely up to you!
Prep for sewing by layering from bottom to top - batting, Fabric A right side up, Fabric B right side down. No worries at this point if Fabric A and B are mixed up - it will all work out in the end! Pin with 2 or 3 pins on each side to keep layers together.

Sew with 1/4" or 3/8" seam - I just line up the edge of my pressure foot with the fabric - around the entire outside edge of your layered pieces, leaving a 2-3" opening for turning. Clip corners, and trim batting close to sewn seam to reduce bulk.

Turn right side out, paying attention to the corners - we want these neat and tidy as they'll be very visible in the finished product. Hand or machine sew opening closed - I prefer hand stitching as it is less obvious in the finished basket.

Divide each side in half - put in a pin to mark the centers. And then mark halfway between center and the corners (each side will be divided into quarters).

And now, the tricky part - working with the inside of the basket up, bring the pins marking outside pins in to meet the pin in the center. Using a coordinating thread, stitch these 3 points together. Don't despair if your stitching is less than perfect - it won't be noticeable if your thread blends well with your fabrics. After the third side, you should start to see the bowl of the basket forming! We're almost done!

Now, take your fabric corners and flip over the folded edges made by the previous step. I've tacked those folded edges down as they tend to poke out with the passage of time. This is one of those times that a picture just doesn't quite cut it - you'll get it when you have your basket in front of you!

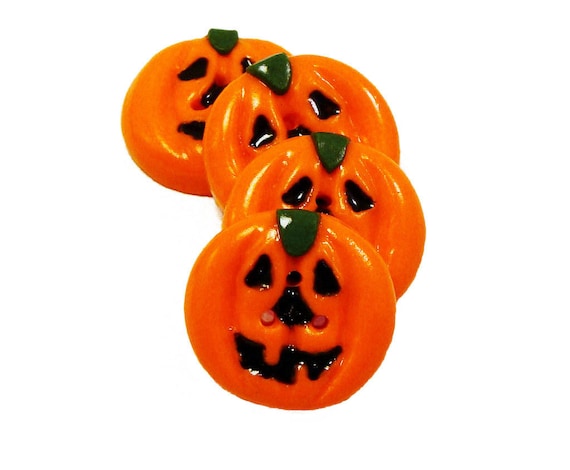
Sew the point down with a decorative button - I've used these sparkly pumpkin ones that I found in the fabric store, but would love to use these ones I found on Etsy:
Polymer Clay Pumpkin Buttons Cofanetto on Etsy
My basket is done and ready to be filled - I'm off to the grocery store to stock up on Halloween candy to fill mine.

These are great for any occasion - I've made one for my grand-daughter for her hair accessories, one in my sewing room for sewing essentials, but I'm sure you can find all kinds of uses for yours! Have fun creating!

--Ann

Linking up with Tip Junkie - (so sorry, couldn't get the button to load!)

Pillow Talk

The Farmer's Prayer Quilt had some fabrics left over and the pattern had bonus instructions for making a pillow.  A block echoing one th...