Wednesday, 3 December 2014

New Mug Rug

The fairies in my quilt guild made one of these for every member of the guild.

Each is slightly different with a cute sewing/quilting quote. I LOVE mine! Thank you guild fairies!

-Ann

Monday, 24 November 2014

From Garage Sale to Completed Quilt

Rainbow Blazing Star
This lovely quilt started as a kit found at a garage sale by my sister-in-law. The details are hazy due to the passage of time, but it somehow ended up in my closet as a UFO (Unfinished Object) or as I prefer, a PHD (project half done). It's been pulled out more than a few times, hung on the design wall and puzzled over how to best finish it.

You see, the centre of this beauty was stretched all out of proportion and when the points of the star were pieced together, the middle of the quilt was quite poofy - in fact, a small animal could have lived in that puffy space. So I ripped carefully took out the seams, just at the centre, took in the seams and finally ended up with a centre that was workable, even though it still had some puffiness to it. 

I then added the gray background and it makes this vintage 70's quilt top look incredibly like a modern quilt. 

My long arm quilter, Marie at Blueberry Hill Quilts picked a great pattern to quilt on it and did a terrific job at the centre - no puckers or excess puffiness. It is only because we have a good working relationship that I even asked her to quilt this one for me - it's not the long-arm quilter's job to quilt out mistakes that can be avoided by accurate piecing.

This quilt is now back at my sister-in-law's and I'm happy she wanted it back!

Do you have any garage sale projects to finish?? I'd love to hear about them!

Pin It

Thursday, 13 November 2014

Christmas Stocking and a Christmas Quilt

A few years ago I made some stockings for a client in Edmonton (blogged here), and I had so much fun making them! When she received them, she had them custom embroidered with names on the cuff.
Stocking Front
Stocking Back
And then she returned the following year to ask that I make some Christmas quilts for her children's beds and supplied me with fabric panels and adorable gold and red reindeer fabric to make both the quilts and the matching pillowcases (blogged here).

Pillowcase
Christmas Quilt
This year, they added another little person to their family and I am so pleased that they asked me to make a stocking and bed quilt for this new person!
Piecing the Christmas Stocking
 I dug through my messy closet and found the cardboard template that I used for the original stockings and was so happy to see that I actually made some notes on what I did and how I put everything together. It made making a matching Christmas stocking much easier and when I went into my stash of Christmas fabrics, I found I still had squares cut to size in the same fabric line that I used originally. So this new stocking is going to look right at home hanging next to the original ones!
Tada! Finished Christmas Stocking
I love the fabric panels that were chosen for the bed quilt & matching pillowcase. And although the original red & gold reindeer border fabric wasn't available, the new fabric chosen (and supplied by the client) with the Christmas hobby horses was a great pick and worked well with the panels.
Christmas Quilt
I am so happy to have finished these in plenty of time for holiday decorating season and would LOVE to see pictures of this client's Christmas house!

--Ann


Pin It

Sunday, 9 November 2014

T-shirt Quilts finished!

Finished these two beauties for a friend last month! Although I haven't seen my friend for a number of years (I went to school with her sister), we have been out of touch for most of our adult lives and now that we are both empty nesters, it has been fun to catch up through Facebook and more recently, in person. 
T-shirt Quilt
Although I sometimes think that technology has way too strong a hold on me and my time, I do love the way it keeps me in touch with people that I would otherwise not cross paths with on a regular basis.
T-shirt Quilt
I have one more quilt to make for this family before Christmas, and I will be sharing it with you when it is complete.

--Ann

Pin It

Monday, 20 October 2014

Four Years of Magpie Quilts!

From my very first sale (a mini quilt) only a week after I started:
Mini windmill quilt

to my first custom order - a wedding quilt for a bride in Boston.
Wedding quilt

to my favourite baby quilt - the scrappy 9-patch
Pink Baby Quilt

and a customer favourite in all sizes - the chevron!
Yellow Gray Black Chevron Quilt

I love this adventure I am on and the quilts will keep on coming out of the sewing room!

--Ann
Pin It

Tuesday, 7 October 2014

Selvage Mug Rug

Wikipedia defines a selvage (US English) or selvedge (British English) as a self-finished edge of fabric. Normally, these are cut off and discarded in the process of making a quilt (or any fabric article), but I've been saving mine for just this kind of project.
Selvage mug rug
A mug rug is a little mini-quilt, larger than a coaster, smaller than a placemat, that you can place your cup and a snack on without it taking up too much space. The beauty of these ones are that they are a great example of making something beautiful out of what otherwise would be trash. 
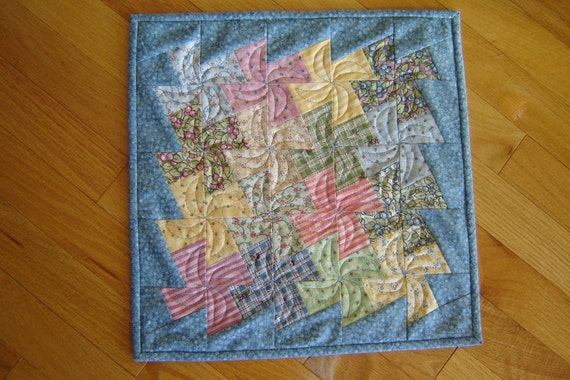
Selvage mug rug in blue
 First, you need to save your selvages. I cut mine with about 1/2" of the main fabric attached. You'll see why when we start sewing them onto the mug rug. This will give you about 1/4" of the main fabric showing after sewing, so if you want more or less fabric showing, cut your fabric selvages accordingly.
Cutting your selvages
 Next, cut a backing fabric and a piece of batting just a bit larger than you want the final mug rug to be. I like my mug rugs to finish at about 7" x 9", so I cut my backing and batting 8" x 10". This is also a great way to use up those batting scraps that aren't big enough for anything else.
Preparing the backing & batting
 Lay your first selvage strip across the diagonal. Take a second selvage strip and lay it parallel on top with the selvage edge about 1/4" overlapping the raw cut edge of the first strip. Using a matching thread and a straight stitch (or a decorative thread and decorative stitch - anything goes, really!), sew just a little inside the selvage edge through all layers. This will quilt your mug rug as you go and when the top is done, all you will have left to do is the binding.
Starting to add strips
 Continue stitching until half of your mug rug is complete and then carry on and do the other half, remembering that you will be slipping the raw edge under the selvage edge on this half.
Top stitch at edge of selvage
 This is what your project should look like - roughly the shape you want and with as much or as little fabric showing as you prefer. Play around with colours and the amount of fabric vs selvage showing - it's only scraps that would otherwise end up in the landfill!
Pieced, quilted and ready to trim!
If you are like me, you will want to make more than one of these cute mug rugs, and to make this step easier, you can use painter's tape to mark the  finished size you want on your ruler. You can see that I've marked my ruler at 7" x 9". Place over your pieced strips, and cut the first two sides square. (I've cut from the back for this photo as it's easier to see than with the stripped side.)
Trimming the mug rug
 Turn your piece 180 degrees, line up your painters tape on the cuts you made in the previous step and cut the remaining two sides square.

Trimming the mug rug
And here's your mug rug, pieced, quilted and ready for binding. 
Trimmed and ready for binding
There is a definite up and down to these mug rugs because of the text on the selvage edges, so if you are making a matching set, watch how you place that first strip so they all angle the same direction.
Blue selvage mug rug (slant top left to bottom right)
Blue selvage mug rug (slant bottom left to top right)
Add binding using whatever method suits you best - google "how to bind a quilt" if you are unsure and voila! You are finished!

Keep the mug rug for yourself or package it up with a mug, some coffee/tea/hot cocoa, a package of cookies and give as a gift to someone special!

Until next time!
--Ann

PS. I apologize for the crazy inconsistent fonts! Sometimes technology baffles me!

Pin It

Pillow Talk

The Farmer's Prayer Quilt had some fabrics left over and the pattern had bonus instructions for making a pillow.  A block echoing one th...